How to Perform the Clean: Technique & Muscles Used

January 04, 2026 12 min read

How to Perform the Clean:  Technique  & Muscles Used

The clean is one of the most effective total-body exercises for building explosive power and functional strength. This comprehensive guide breaks down the exact technique for performing the clean whilst explaining which muscles are working during each phase of the movement. Whether you're new to Olympic lifting or looking to refine your technique, understanding both the mechanics and the muscular demands will help you master this dynamic lift.

What Is the Clean?

The clean is an Olympic weightlifting movement that involves explosively lifting a loaded barbell from the floor to the front rack position (resting on your shoulders) in one fluid motion. It's a compound, multi-joint exercise that requires coordination, speed, strength, and mobility whilst recruiting virtually every major muscle group in your body.

The clean can be broken down into six distinct phases, each with specific technical requirements and muscular demands. Mastering each phase individually before combining them into the complete movement is the most effective learning approach.

Phase 1: The Setup (Starting Position)

How to Perform the Setup

  1. Foot position: Stand with your feet hip-width apart (approximately 6-8 inches between heels), toes pointed slightly outward at 5-15 degrees. Position the barbell over the balls of your feet, approximately one inch from your shins.
  2. Grip: Grip the bar just outside shoulder width using a hook grip—wrap your thumb around the bar first, then wrap your fingers over your thumb. This grip provides maximum security during the explosive phases.
  3. Hip and knee position: Bend your knees and hips to lower yourself to the bar. Your hips should be higher than your knees but lower than your shoulders. Your hip crease will typically be at or slightly above knee height. Keep your shins nearly vertical or angled slightly forward.
  4. Back position: Maintain a neutral or slightly extended spine—never rounded. Engage your lats by thinking about "bending the bar around your shins" or "putting the bar in your back pockets." Your chest should be up and shoulders back.
  5. Shoulder position: Your shoulders should be directly over or slightly in front of the bar when viewed from the side.
  6. Arms and head: Keep your arms completely straight—they're simply hooks connecting you to the bar. Maintain a neutral head position with your eyes focused 2-3 metres ahead on the floor.
  7. Create tension: Before lifting, push your feet through the floor, engage your lats, and brace your core. The bar should feel light in your hands before it leaves the floor.

Muscles Used in the Setup

Whilst the bar hasn't moved yet, numerous muscles are already working isometrically (contracting without changing length) to create and maintain the proper position:

  • Quadriceps: Engaged to maintain knee flexion and create tension through the legs
  • Hamstrings and glutes: Loaded and creating tension at the hips
  • Erector spinae: Maintaining spinal extension and preventing the back from rounding
  • Latissimus dorsi: Pulling the bar back towards the body and keeping it close
  • Trapezius (middle and lower): Stabilising the shoulder blades
  • Rhomboids: Retracting the shoulder blades
  • Core (rectus abdominis, obliques, transverse abdominis): Bracing the spine and creating intra-abdominal pressure
  • Forearm flexors: Gripping the bar

Phase 2: The First Pull (Floor to Knee)

How to Perform the First Pull

  1. Initiation: Begin the movement by driving through your entire foot, pushing the floor away. Think "leg press" rather than "deadlift"—the movement should be initiated by your legs, not your back.
  2. Maintain position: Your back angle should remain constant during the first pull. Your shoulders and hips should rise at the same rate. If your hips shoot up faster than your shoulders, you've lost optimal leverage.
  3. Bar path: The bar should travel vertically or even slightly back towards your body. It should remain in contact with or within 1-2 centimetres of your shins throughout this phase.
  4. Speed: The first pull should be controlled and deliberate, not rushed. Think "controlled aggression."
  5. Arms: Keep your arms completely straight throughout the first pull. Any early arm bend wastes energy and reduces efficiency.
  6. Shoulders: Your shoulders should stay over or slightly in front of the bar as it rises from the floor to knee height.

Muscles Used in the First Pull

The first pull is primarily a leg-dominant movement with significant posterior chain involvement:

  • Quadriceps (rectus femoris, vastus lateralis, vastus medialis, vastus intermedius): Primary movers extending the knees and driving the bar off the floor
  • Gluteus maximus: Initiating hip extension whilst maintaining the back angle
  • Hamstrings (biceps femoris, semitendinosus, semimembranosus): Working with the glutes to control hip position and contribute to extension
  • Erector spinae (iliocostalis, longissimus, spinalis): Maintaining spinal extension under increasing load as the bar rises
  • Latissimus dorsi: Keeping the bar close to the body and preventing it from drifting forward
  • Trapezius (all portions): Stabilising the shoulder girdle and maintaining shoulder position over the bar
  • Rhomboids: Supporting scapular stability
  • Core musculature: Maintaining spinal stability and transferring force from the lower body
  • Gastrocnemius and soleus (calves): Stabilising the ankle joint and contributing to the drive through the floor

Phase 3: The Transition (Scoop/Double Knee Bend)

How to Perform the Transition

  1. Knee rebend: As the bar passes your knees, shift your knees forward slightly, moving them back under the bar. This is a subtle movement—you're not squatting down, just repositioning your knees.
  2. Torso adjustment: As your knees move forward, your torso becomes more vertical. This shift loads your powerful hip extensors like a coiled spring.
  3. Bar contact: The bar should brush your thighs during this transition. It should never crash into your legs or drift away from your body.
  4. Power position: You're now in the "power position"—bar at mid-thigh, knees slightly bent, torso more upright, weight through mid-foot, lats engaged. This is your launching pad for the explosive second pull.

Muscles Used in the Transition

The transition phase involves a complex muscular coordination as you shift from the first pull position to the power position:

  • Quadriceps: Controlling the knee rebend and maintaining tension
  • Gluteus maximus and hamstrings: Loading eccentrically (lengthening under tension) as the torso becomes more vertical, storing elastic energy for the second pull
  • Erector spinae: Adjusting to maintain spinal extension as the torso angle changes
  • Latissimus dorsi: Continuing to keep the bar close and control bar path
  • Hip flexors (iliopsoas, rectus femoris): Assisting with the subtle repositioning
  • Core musculature: Maintaining stability through the positional change

Phase 4: The Second Pull (Explosion)

How to Perform the Second Pull

  1. Triple extension: Violently and simultaneously extend your ankles, knees, and hips. This is the most explosive phase of the clean. Drive through the floor with maximum force.
  2. Direction: All force should be directed vertically. Avoid jumping forward—any horizontal movement indicates technical errors.
  3. Shrug: As you reach full extension, aggressively shrug your shoulders upward. This continues the bar's upward momentum.
  4. Bar path: The bar should travel as close to your body as possible, ideally brushing your thighs and hips.
  5. High pull: After the shrug, your elbows bend and pull high and outside (like an upright row). This keeps the bar close whilst you transition under it.
  6. Timing: Don't cut your extension short. Reach full triple extension before transitioning under the bar.

Muscles Used in the Second Pull

The second pull is the most powerful phase, requiring maximum force production from the entire posterior chain and lower body:

  • Gluteus maximus: Primary hip extensor, producing massive force to drive the hips forward and upward
  • Hamstrings: Working synergistically with the glutes for explosive hip extension
  • Quadriceps: Powerfully extending the knees to drive the bar upward
  • Gastrocnemius and soleus: Extending the ankles (plantarflexion) to complete the triple extension
  • Erector spinae: Maintaining spinal extension whilst transferring force from the hips
  • Trapezius (upper portion): Powerfully shrugging the shoulders to continue bar acceleration
  • Levator scapulae: Assisting with the shrug
  • Deltoids (all three heads): Beginning to engage as the elbows bend and pull
  • Biceps brachii and brachialis: Assisting with the high pull, though the arms should remain relatively relaxed
  • Forearm flexors: Maintaining grip on the bar during the explosive movement
  • Core musculature: Maximally braced to transfer force and protect the spine

Phase 5: The Turnover and Catch

How to Perform the Turnover and Catch

  1. Pull under: Rather than waiting for the bar to reach maximum height, actively pull yourself down under the bar. Think "meet the bar" not "wait for the bar."
  2. Elbow rotation: Your elbows must rotate around and under the bar with maximum speed. This is often the limiting factor in the clean. Your elbows should finish high and pointing forward.
  3. Front rack position: The bar should rest on your anterior deltoids (front of shoulders) and clavicles, not in your hands. Your hands are simply guiding the bar—only your fingertips may be in contact.
  4. Elbow height: Drive your elbows as high as your mobility allows, ideally with your upper arms parallel to the floor or higher.
  5. Foot position: Your feet should land in your squat stance (slightly wider than hip width) simultaneously with the bar landing on your shoulders. Land flat-footed with weight distributed across your entire foot.
  6. Catch depth: For power cleans, catch with thighs above parallel. For squat cleans, receive the bar in a full front squat (hip crease below knee). Heavier weights require catching lower.
  7. Torso position: Maintain an upright torso with your core braced. The catch should feel solid and controlled.

Muscles Used in the Turnover and Catch

The catch phase requires rapid muscular coordination and tremendous stability:

  • Deltoids (anterior, medial, posterior): Creating the shelf for the bar to rest on and stabilising the shoulder joint
  • Trapezius (upper): Supporting the bar position on the shoulders
  • Rhomboids: Stabilising the scapulae
  • Rotator cuff muscles (supraspinatus, infraspinatus, teres minor, subscapularis): Stabilising the shoulder joint during the rapid turnover
  • Triceps brachii: Controlling elbow position
  • Wrist extensors: Supporting the wrist in extension to create the front rack position
  • Quadriceps: Eccentrically controlling the descent into the catch and stabilising the knee joint
  • Gluteus maximus and hamstrings: Controlling hip flexion and stabilising the catch position
  • Adductors (adductor magnus, longus, brevis): Stabilising the hips in the catch
  • Core musculature: Maximally engaged to maintain an upright torso and prevent the bar from pulling you forward
  • Erector spinae: Maintaining spinal extension in the catch
  • Hip flexors: Controlling the depth of the catch
  • Tibialis anterior: Stabilising the ankle in dorsiflexion

Phase 6: The Recovery

How to Perform the Recovery

  1. Drive through the floor: Push through your heels and mid-foot to stand up from the catch position.
  2. Maintain position: Keep your torso upright and elbows high throughout the recovery. Lead with your chest, not your hips.
  3. Core tension: Maintain maximum core bracing to support the weight and keep the bar stable on your shoulders.
  4. Complete extension: Stand to full hip and knee extension. The lift isn't complete until you're standing fully upright with control.

Muscles Used in the Recovery

The recovery is essentially a front squat, requiring tremendous leg and core strength:

  • Quadriceps: Primary movers extending the knees to stand up from the catch
  • Gluteus maximus: Powerfully extending the hips
  • Hamstrings: Assisting with hip extension
  • Adductors: Stabilising the hips and assisting with extension
  • Erector spinae: Maintaining spinal extension and preventing forward lean
  • Core musculature: Preventing the torso from collapsing forward under the load
  • Deltoids: Continuing to support the bar on the shoulders
  • Trapezius: Maintaining shoulder position
  • Gastrocnemius and soleus: Stabilising the ankle joint

The Cleans Muscle Recruitment Summary

The clean's effectiveness as a total-body exercise becomes clear when you consider the comprehensive muscle recruitment throughout the entire movement:

Lower Body Muscles

  • Quadriceps: Heavily involved in all phases, particularly the first pull, catch, and recovery
  • Gluteus maximus: Primary hip extensor, crucial for the second pull and recovery
  • Hamstrings: Supporting hip extension and controlling position throughout
  • Adductors: Stabilising the hips and assisting with extension
  • Hip flexors: Controlling hip position and assisting with the transition
  • Gastrocnemius and soleus: Providing ankle stability and contributing to triple extension
  • Tibialis anterior: Stabilising the ankle, particularly in the catch

Posterior Chain Muscles

  • Erector spinae: Maintaining spinal extension throughout all phases
  • Latissimus dorsi: Keeping the bar close and controlling bar path
  • Trapezius (upper, middle, lower): Shrugging, stabilising, and supporting the bar
  • Rhomboids: Scapular stability and retraction

Core Muscles

  • Rectus abdominis: Preventing spinal flexion and maintaining posture
  • External and internal obliques: Rotational stability and core bracing
  • Transverse abdominis: Creating intra-abdominal pressure for spinal stability
  • Multifidus: Deep spinal stabilisation

Upper Body Muscles

  • Deltoids: Creating the front rack shelf and stabilising the shoulders
  • Rotator cuff: Shoulder joint stability during the turnover
  • Biceps and triceps: Controlling elbow position and assisting with the pull
  • Forearm flexors and extensors: Gripping the bar and supporting the front rack position

Common Clean Technique Mistakes and How to Fix Them

Mistake 1: Hips Rising Too Fast

What it looks like: During the first pull, your hips shoot up faster than your shoulders, creating a more horizontal back angle.

Why it happens: Weak quadriceps, poor starting position, or attempting to use the clean like a deadlift.

How to fix it: Strengthen your quads through front squats and clean-grip deadlifts. Focus on the cue "chest and hips rise together." Film yourself from the side to monitor your positions. Consider starting with your hips slightly lower if your proportions require it.

Mistake 2: Early Arm Bend

What it looks like: Your arms bend during the first or second pull as you try to "muscle" the bar up.

Why it happens: Misunderstanding the movement mechanics or weak leg drive leading to compensation with the arms.

How to fix it: Focus on "pushing the floor away" rather than pulling the bar up. Practise clean pulls with straight arms. Use the cue "arms are ropes." Strengthen your leg drive so you don't need to rely on your arms.

Mistake 3: Jumping Forward

What it looks like: Your feet land significantly forward of where they started.

Why it happens: The bar is too far from your body, or you're extending your hips too early, creating horizontal rather than vertical force.

How to fix it: Engage your lats from the setup to keep the bar close. Practise hang cleans to isolate the second pull. Use the cue "jump straight up" or "stomp your feet down." Film yourself from the side to check bar path.

Mistake 4: Slow Elbows in the Catch

What it looks like: Your elbows don't rotate quickly or high enough, causing the bar to crash down or roll forward.

Why it happens: Limited front rack mobility, weak upper back, or lack of aggression in pulling under the bar.

How to fix it: Improve front rack mobility through thoracic extensions, lat stretches, and wrist mobility work. Practise tall cleans to develop elbow speed. Use the cue "elbows through fast." Perform front rack holds to build strength and comfort in the position.

Mistake 5: Rounded Back

What it looks like: Your spine rounds (flexes) during any phase of the lift.

Why it happens: Weak erectors, poor core strength, limited mobility, or attempting weights that are too heavy.

How to fix it: Reduce the weight immediately. Strengthen your erectors and core through Romanian deadlifts, good mornings, and planks. Improve thoracic mobility. Never sacrifice spinal position for weight. If you cannot maintain a neutral spine from the floor, start with hang variations.

Mobility Requirements for the Clean

Proper clean technique requires adequate mobility in several key areas. Address these to improve your performance and reduce injury risk:

1) Ankle Dorsiflexion

Why it matters: Limited ankle mobility prevents you from achieving proper depth in the catch whilst maintaining an upright torso.

How to improve: Perform ankle mobilisations against a wall, calf stretches (both straight and bent knee), and consider weightlifting shoes with an elevated heel.

2)  Hip Mobility

Why it matters: You need sufficient hip flexion and external rotation to achieve a deep catch without your lower back rounding.

How to improve: Practise deep squat holds, hip flexor stretches, 90/90 stretches, and Cossack squats.

3) Thoracic Extension

Why it matters: Thoracic mobility is crucial for maintaining an upright torso and achieving a proper front rack position with high elbows.

How to improve: Foam roll your thoracic spine, perform cat-cow stretches, and practise thoracic extensions over a foam roller.

4) Shoulder and Wrist Flexibility

Why it matters: The front rack position requires your shoulders to allow high elbows whilst your wrists extend to create a shelf for the bar.

How to improve: Perform lat stretches, wrist extensions and flexions, front rack holds with a light barbell, and banded shoulder distractions.

Programming the Clean

For Beginners

Frequency: 2-3 times per week

Sets and reps: 4-6 sets of 2-3 reps

Intensity: 50-70% of estimated 1RM

Focus: Perfect technique over weight. Film yourself regularly and seek coaching feedback.

Progression: Start with muscle cleans, progress to hang cleans, then full cleans from the floor once technique is solid.

For Athletic Development

Frequency: 2-3 times per week

Sets and reps: 4-5 sets of 2-3 reps

Intensity: 70-85% of 1RM

Focus: Maximal bar speed and explosive intent. Perform cleans early in your session when fresh.

For Maximum Strength

Frequency: 3-5 times per week

Sets and reps: 5-8 sets of 1-3 reps

Intensity: 75-95% of 1RM

Focus: Progressive overload whilst maintaining technical precision. Include variations and accessory work.

Essential Strength Equipment

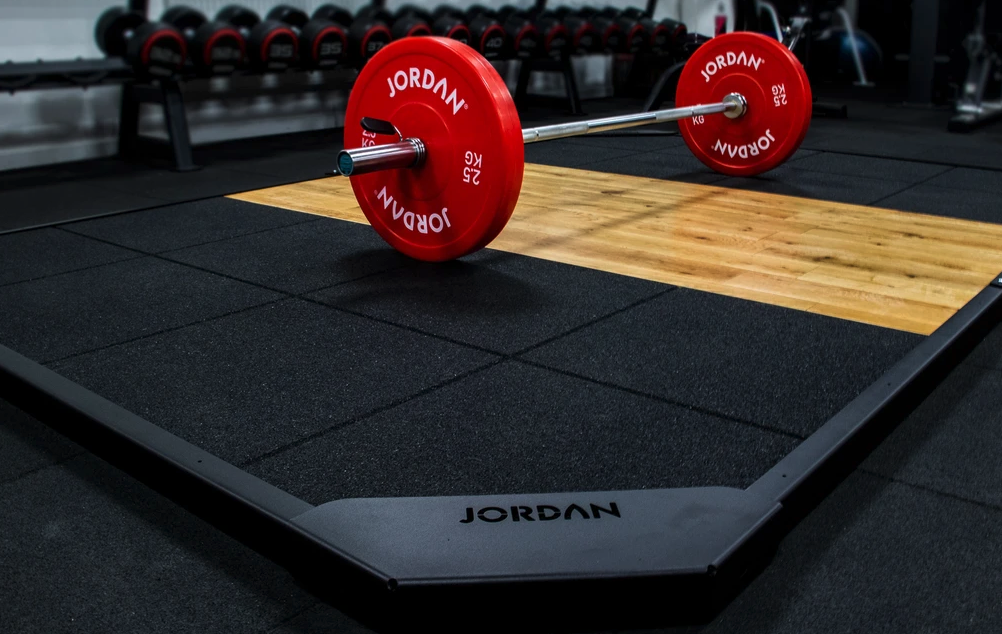
To perform cleans safely and effectively, you'll need:

  • Olympic barbell: A barbell with rotating sleeves (20kg for men, 15kg for women)
  • Bumper plates: Allow safe dropping and ensure correct bar height
  • Lifting platform: Protects your floor and provides a stable surface
  • Weightlifting shoes: Elevated heel improves ankle mobility and catch position
  • Chalk: Improves grip security
  • Squat rack: For loading plates and accessory exercises

Concluding Thoughts

The clean is a technically demanding but extraordinarily rewarding exercise. By understanding the precise technique for each phase and recognising which muscles are working throughout the movement, you can approach your training with greater intelligence and purpose.

Remember that mastering the clean is a journey, not a destination. Even elite Olympic weightlifters continue refining their technique throughout their careers. Focus on consistent practice, progressive overload, and maintaining perfect form. Film your lifts regularly, seek qualified coaching when possible, and be patient with the learning process.

The comprehensive muscle recruitment, explosive power development, and athletic benefits make the clean worth the investment in learning proper technique. Whether you're an athlete seeking improved performance, a weightlifter pursuing competition goals, or a fitness enthusiast challenging yourself with a demanding movement, the clean offers unparalleled benefits for total-body strength and power.